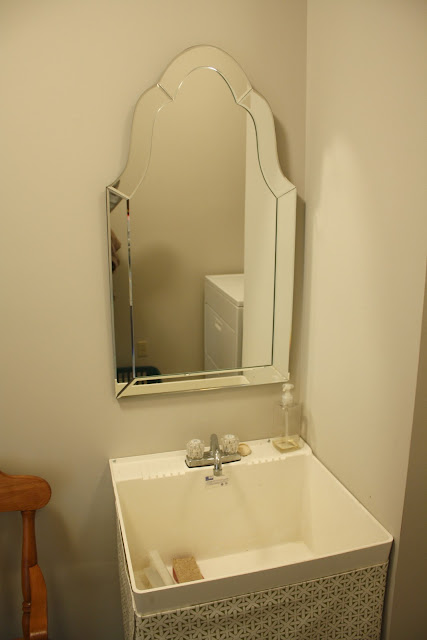
I am so glad that Amy from Plain & Fancy Living sent this fabulous and thrifty DIY project my way.
She was also kind enough to give us a quick tutorial too!
Thanks for sharing my project on your Thrifty Tuesday’s Series Danielle! I was tired of looking at the unsightly plumbing and cleaning bucket under the unattractive builder’s grade utility sink in my laundry room.
I decided to make a “no sew” skirt to hide the bottom half of the sink. I paid $8.48 for 3/4 yard of fabric in a geometric print. First, I measured the sink and to see how much fabric I needed for the front, side and corner panel. I wanted the skirt to look custom and have easy access to the cleaning bucket underneath.
Once I had my measurements, I cut the fabric into three separate pieces. I applied the “no sew” hem to the corner piece first, then I started hemming the front and side panels. I had to allow room to overlap the top hem over the corner piece that I had already hemmed.
I did whip out a few real stitches to reinforce the fabric where the pieces met as added security. This is the only place I used a needle and thread.
I finished hemming the bottom of the skirt.
I wanted to protect the fabric from spills and dirt. I applied this fabric protector spray.
I applied this crazy sticky velcro to the sides and corner of the utility sink and tacked the edge of the side panel to the wall with an upholstery nailhead that I had leftover from my corkboard project (I always try to use project leftovers whenever possible).
I peeled off the outside piece of adhesive paper from the velcro and placed the skirt right at the edge of the lip of the sink. I pressed really hard to make sure the fabric was sticking to the velcro. I continued all the way around the corner and front of the sink until it was completely covered.
I added this really cute mirror that I found at Lowe’s (it was on sale for around $60) that looks very similar to a Pottery Barn mirror. The dimensions for this mirror were perfect for the space.
BEFORE
AFTER
This project was super easy, fast and thrifty. I spent the most money on the mirror but I think it was worth it.


0 comments:
Post a Comment